Underwater effect, decals, and LZ4 compression
A little zoo of topics here, and what they have in common is me avoiding gameplay programming (which comes next), and that they're again nice-to-haves rather than essentials. But they were all fun to do, so that's that. Here's a video that shows the underwater effect and the decals:
Underwater effect
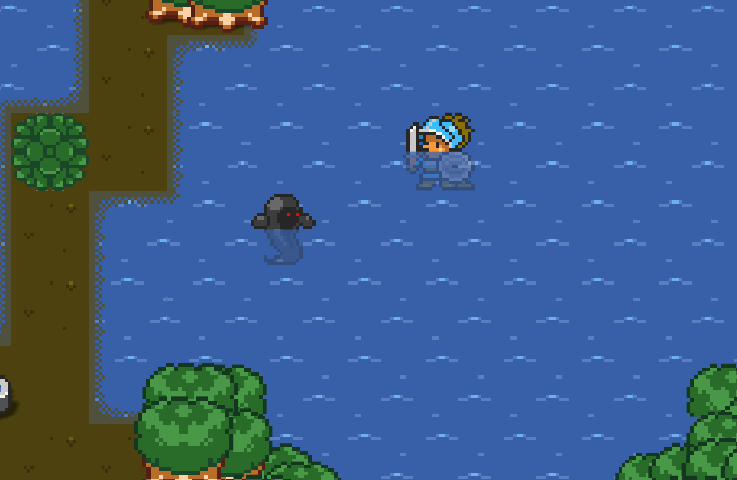
Recently I refactored sprite rendering to use variants with multiple configuration variables, one of them being the type of the pass being regular, shadow or occluded. The occluded pass is like the regular pass, but we draw in areas that fail the Z test, and make this pass semi-transparent. So far so good, and what does this have to do with the underwater effect?
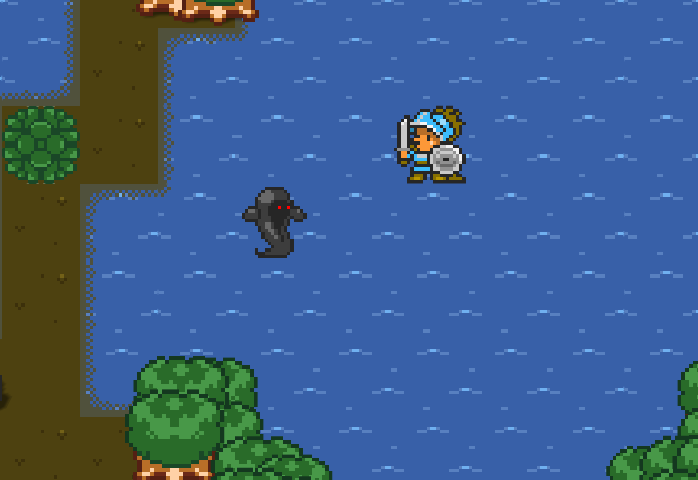
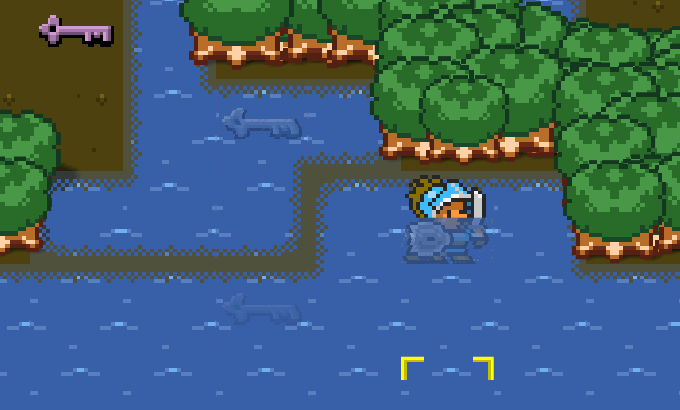
Well, previously my sprites have been holier-than-thou, as they all seem to be walking on top of any body of water, like the sea or some lakes/rivers in the level maps. Clearly that does not look very nice, and does not give the impression that we're inside that liquid. So, after a few experiments, I thought I'd reuse (the programmer's wet dream) the occluded pass to do that. How? A bit of background info first: In my rendering pipeline, sprites do use depth/Z values, so I can have order in rendering, characters appearing behind trees, etc.
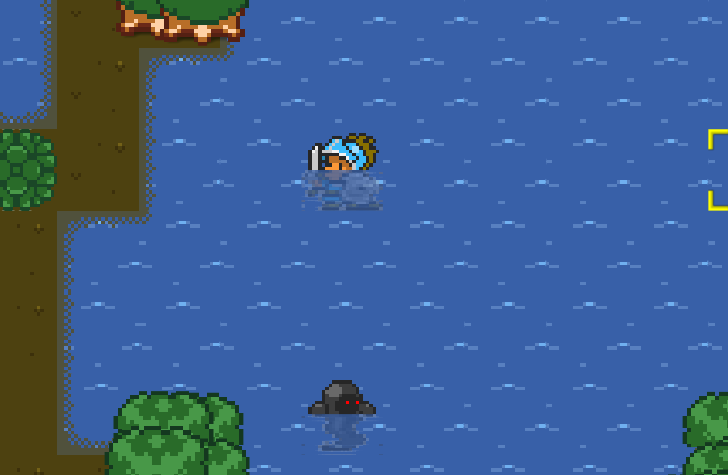
First we need to detect when we're on tiles with liquid. On those tiles, push the Z value further back: more for deep liquid, less for shallow liquid. Push the sprites so that part of the sprites is underground. Important: the position on screen is identical, I'm just pushing the Z value so that part of the sprite will fail the Z test
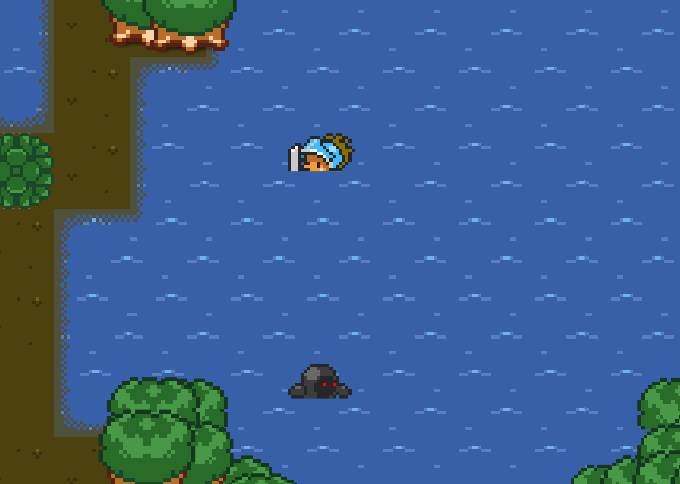
Now sprites are successfully hiding in the liquid, and so far it's already looking good! Some short creatures might be completely underwater though, so you won't be able to see them. So we can enhance the visualization, and here is where we consider the occlusion pass.
Since there's going to be a part of the sprite that fails the Z test, this will pass the occluded pass test (which renders what fails Z test), so it really "just works" as long as no settings are changed (I had to hack things to show how it would look without the occluded pass running). The sprite portion that's underwater is naturally rendered with transparency.
And now for the fun of it, because we know that things get distorted underwater and that water is never perfectly still, especially as adventurers and monsters plow through it, we can add a little bit of distortion in the occluded area. So in the pixel shader, if the occluded area represents area-in-liquid (we already have used this info in the vertex shader to push the Z back), then we just apply some periodic distortion in the sampling of the horizontal texture coordinate. And here's the result!
Finally, just to spice things up slightly more, items dropped underwater are slightly visible, and the level of visibility depends on the depth. So, in shallow liquid are generally faint, but in deeper water they are even more faint. Maybe I should make them completely invisible in deep water, but let's see, maybe later.
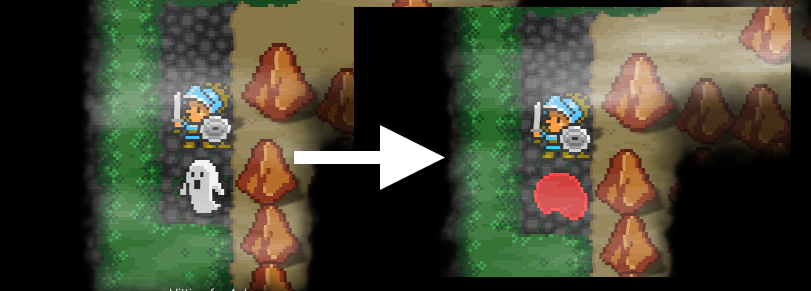
Decals
One common effect in games is decals: images that are used as "stickers" in the game world. Examples could be footprints, blood spatter, scorch marks, etc. While these have certain challenges in order to implement in 3D, it's far easier to do in 2D, as it's just another sprite splatted in the world. And typically, decals can fade out after a while. So, since I've got the relevant rendering machinery already, I wanted to add support for decals, for any purpose that I see fit later on.
What should have been a walk in the part, turned out to be a pain thanks to Unity's bad rendering debugging facilities. So, given the way I've structured the code, adding decals should have been a walk in the park. It's another sprite pass, and I implement it as a persistent particle system, where decals have a lifetime of 5-10 seconds, after which they fade out. So, I added a few blood spatter sprites, wrote a basic shader and hooked the systems up, and lo and behold, nothing to be seen. Long story short and a few hours later, the problem was that the Compute buffer (that I'm using to send instancing data) was set up on C# side to be 3 uints per element, and in the shader I had a StructuredBuffer<uint> that I was addressing by buffer[i*3+0], buffer[i*3+1] and buffer[i*3+2]. I was expecting that the memory would be aliased but that was not the case. And no errors of course did not help ("Hey, you're binding a uint3 buffer to an incompatible uint shader buffer!"). Anyway, long story short, that was it, and now we have decals. I hooked them up with damage, so that when a creature gets damaged it spawns a small blood spatter, and when it gets killed it spawns a big one. Yay for proof of concept, more to come when needed.
LZ4 compression for save files
Save files can get large, due to the large number of 2D arrays for various purposes: lots of layers per map, world map data, some other heavyweight caches, entities, etc. The finished game should have hundreds of cities and dungeons. I'm not going to go too deep into this rabbit hole for now, as it's eventually loading needs to become asynchronous, but to begin with, I wanted to reduce the file size.
The starting test case is 7 multi-level dungeons , so about 15-25 levels altogether, plus world map. Size on disk is 21MB, it takes about 3.2 seconds to save and 3.5 seconds to load (in Play in Editor, not final build). So I got a simple LZ4 implementation for C++ and put it in the C++ plugin. The plugin now has 3 more functions:
- Save an array of bytes to a file using LZ4
- Get the number of uncompressed bytes needed by an LZ4 file on disk
- Decompress an LZ4 file to a preallocated array of bytes
The LZ4 bytes store as a first value an integer with how many bytes will we need. The reason I did that was because the plugin functions work with preallocated memory. So C# can query the correct size, allocate the byte array and send the array to be populated in C#. Still it's far from optimal due to some possibly unnecessary copies, but hey, it works.
The timings for the LZ4 version are pretty much the same, but the file size is now 5MB instead of 21MB. Yay!