Autotiling Adventures Part IV: Mountains, trees and props
Previously I utilized HoMM 3 assets for extracting biome detail textures.
This time, the next logical step is to add more foreground detail, such as trees, rocks, mountains and other props. I continue to utilize HoMM 3 assets, as they work pretty well and are relatively close to how I'd like things to look. Of course I'll eventually have to make my own, as these are not mine, but that's a problem for much, much later.
The pipeline from start to end for adding such foreground detail can be summarized by the following: First, identify the assets of interest. Then, pack them in a texture atlas and create an associated data file with per-prop information. Then, write the logic to place props on a map based on biome information. Finally, use the prop placement data to render the props onscreen.
Step 0: Tools
In order to process the assets, we need to understand them first. Kudos to the following, as without these I wouldn't have done much:
- Standalone HoMM 3 map editor with extra features
- MMArchive: Loader of HoMM 3 archives
- Python utilities for extracting HoMM 3 archive data
Using the above, we can observe the assets and look at their properties (map editor), we can get the lists of all assets and asset types for the maps (MMArchive), and also extract all the images (python utilities)
Step 1: Identify assets of interest
This was a tedious process, going through each asset and identifying if it's suitable to use as foreground detail. The source data were the following: 1) a text file with asset properties, such as suitable environments, asset type, image names, etc 2) a text file with all asset types 3) a large set of images
I've never worked with a tile-based engine before, so I observed several things that look like common sense:
- Good overlapping look can be achieved when rendering props in the map top-to-bottom (makes sense as in a top-down view, elements on the top are further back), right-to-left (no idea why)
- Each asset is logically divided into 32x32 pixel regions, which I call subtiles. The subtiles are used in HoMM as single grid cells (e.g. a unit occupies a single subtile). Game data store movement blocking and entrance masks using subtiles. The maximum subtile number is 8x6, which means a 256x192 image.
- Some multi-subtile assets could safely overlap, typically mountains and trees
Step 2: Generate texture atlas and data file
Having a list of assets of interest, we can now pack the images into an atlas and also save information per element. The information stored is:
- General category, such as "Landscape features", "Vegetation", "Props". Used for filtering assets.
- Specific category, such as "Craters", "Mountains", "Trees". Used for filtering assets.
- Subcategory, such as "Oak trees", "Rock". Used for filtering assets.
- Element ID, such as "avlmtdr2" (unique names used in the game data). Used for unique asset addressing
- Composition group, such as "avlmtdr" (unique names without the number suffix, that indicates a group). Used to determine safe overlap of assets
- Subtile num, such as [3, 4]. Used to determine the region that the asset covers
- Subtile occupancy mask, 8x8 bits. Used to determine the per-subtile "logical" coverage
- Subtile render mask, 8x8 bits. Used to determine if we need to render a subtile or not
- Biome mask, 16 bits. Used to determine the biomes that the occupancy-marked tiles can be placed on
The difference between the occupancy and the render mask is as follows:
- The render mask sets bits of tiles that contain at least 1 pixel with a non-zero alpha value
- The occupancy mask sets bits of tiles that act as blockers in the map.
Here's an example:

The red subtiles here mark the occupancy, while all other marked tiles (plus two unmarked with a bit of shadow) mark the renderable parts.
Below is a packed atlas using all assets of interest.
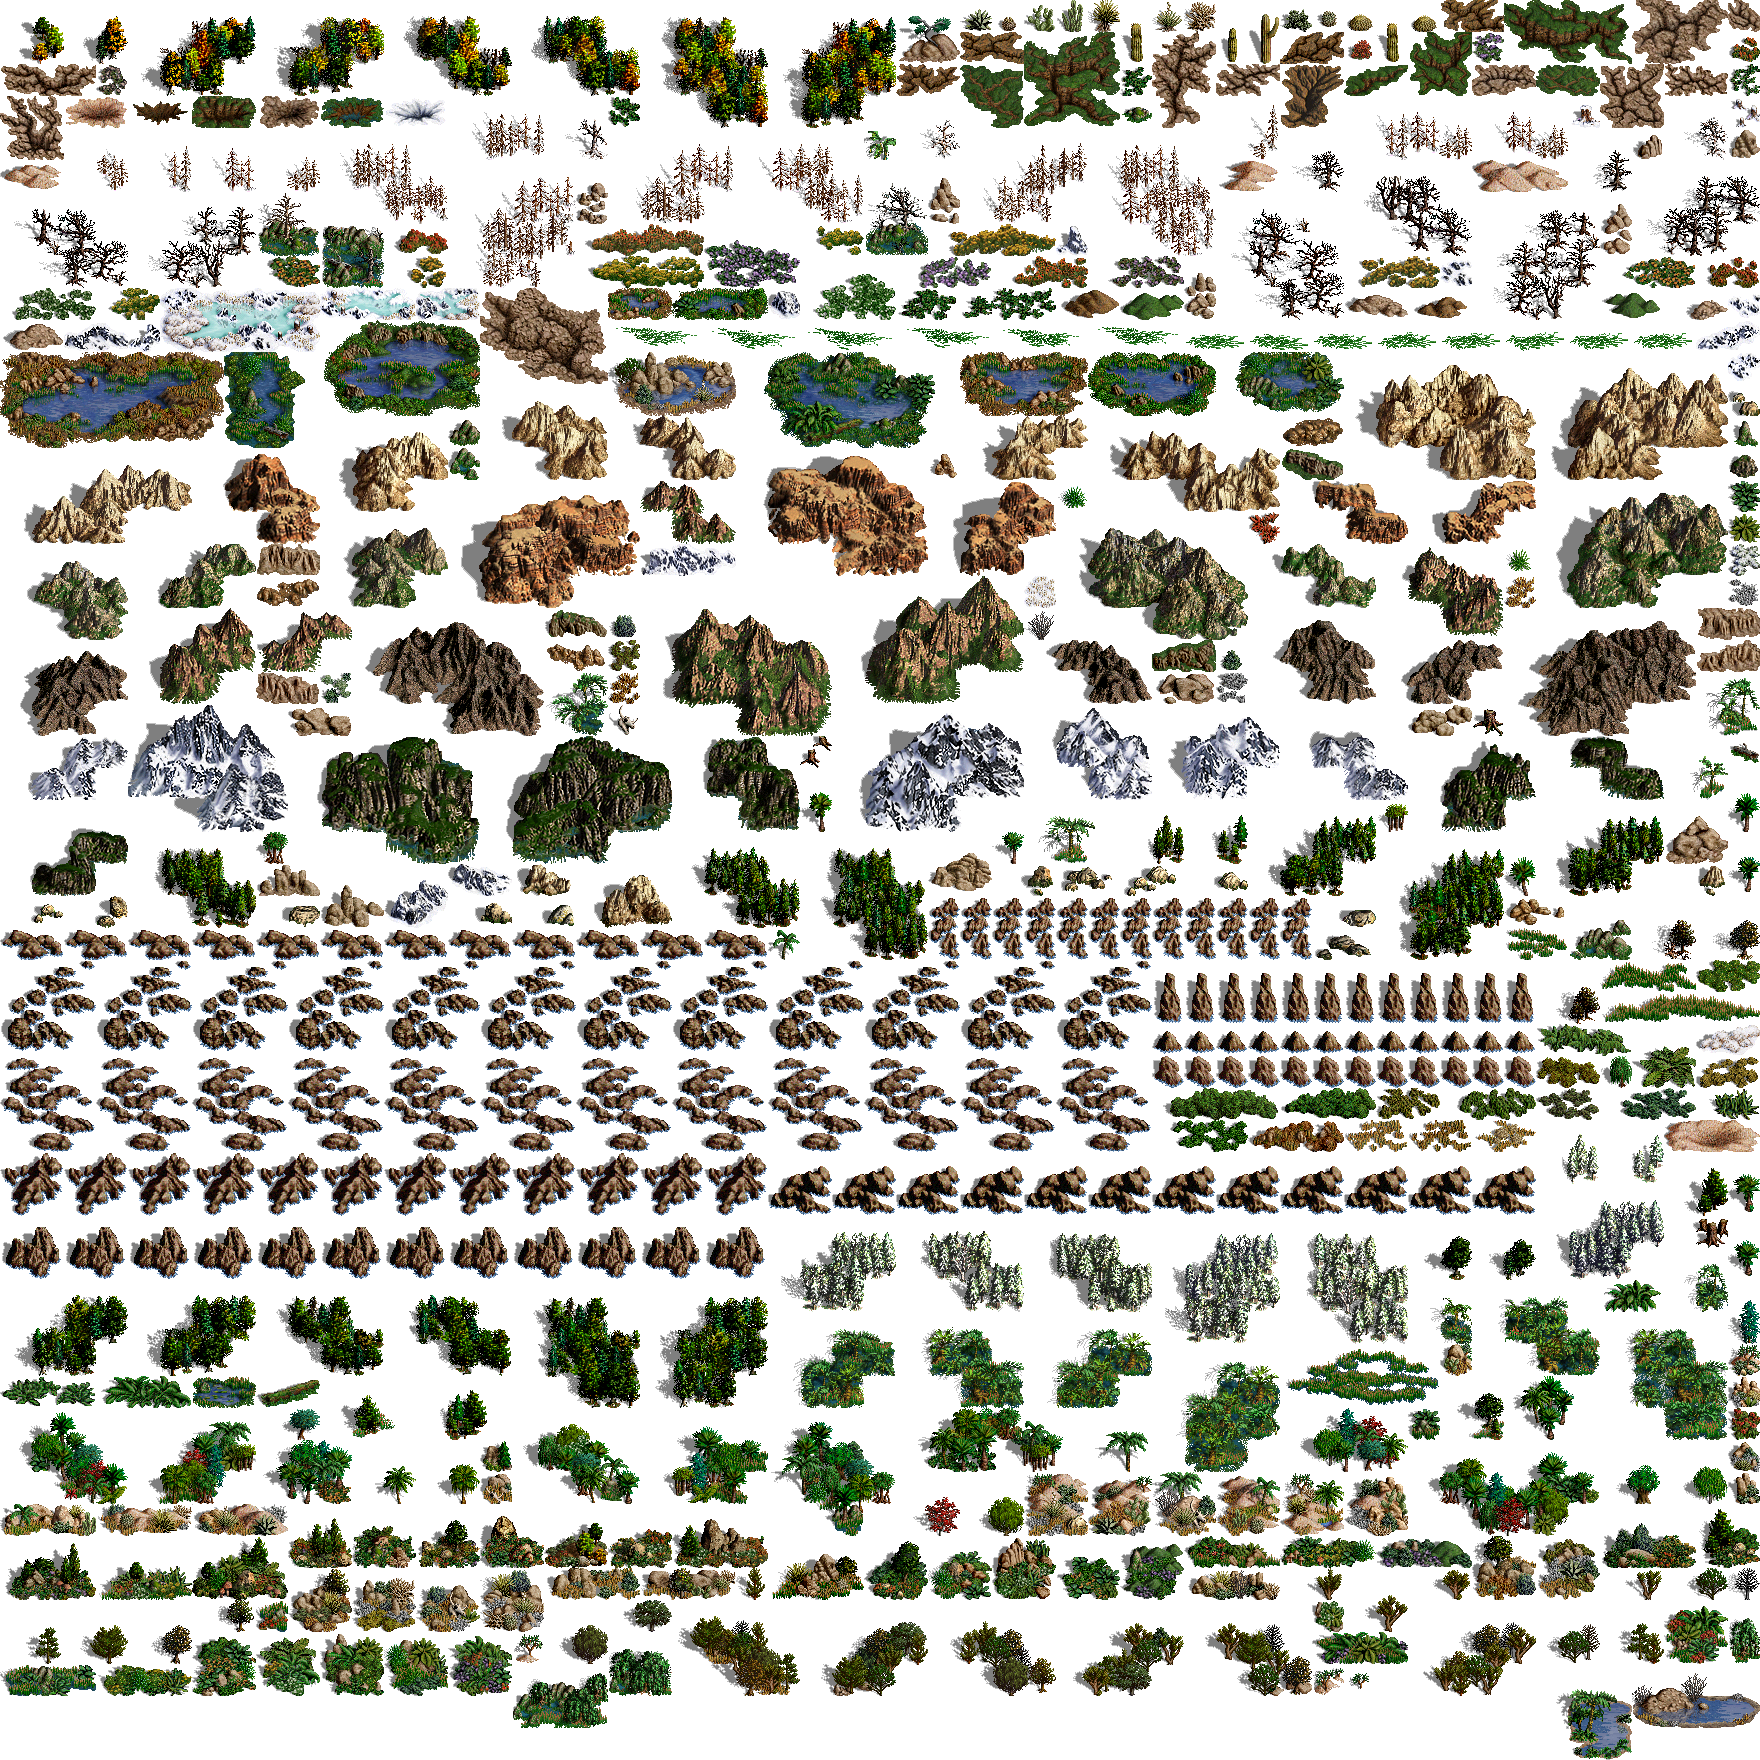
Some assets are animations, in which case we make sure they're on the same line. I used this packing code. Atlas rectangles are named, and they use the Element ID as described above. One more interesting detail about the atlas is that the elements are packed in multiples of 32 pixels, so that means that I can have 6 mipmap levels and still not have any asset bleeding. I also generate a JSON file with the properties of each element.
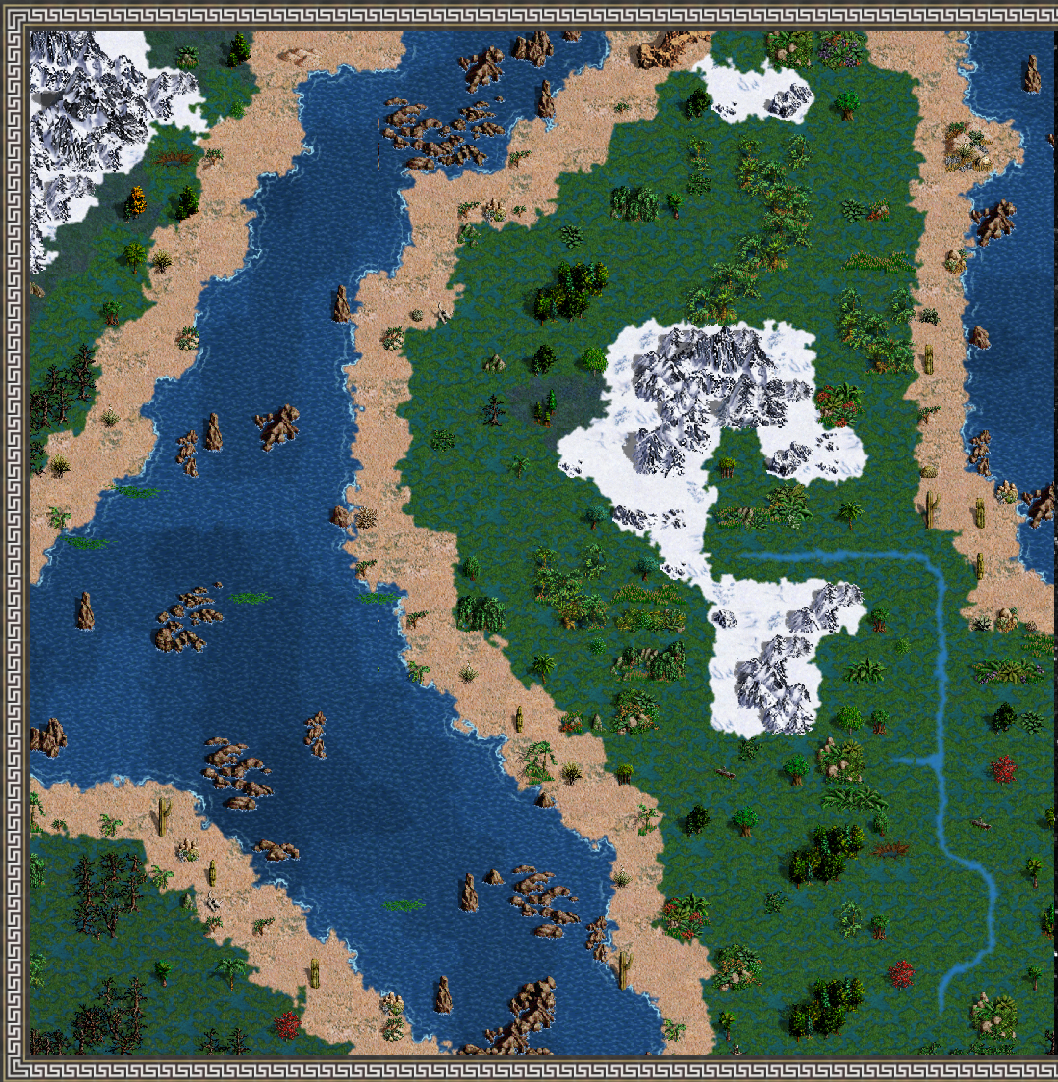
Step 3: Place props based on biome data
Admittedly, I didn't put a supreme amount of effort in placing thing. Little effort yielded reasonable results, so that's ok for now. The placement is really simple. It is comprised of four stages: placing mountains, trees, props and cleaning up.
One important bit: Below, I use the term "map subtile". I split the overworld map tiles to 2x2 smaller tiles: these (map) subtiles correspond to the size of the subtiles of the assets. An asset using 6x3 subtiles (192 x 96 pixels) will be mapped to 3x1.5 overworld tiles.
Placing mountains
First, we go through each subtile on the map whose elevation is high and we try to use it as a starting point for placing any of the assets marked as "Mountains". The placement condition is that all subtiles with an occupancy bit set need to display biome compatibility based on the tile they're on and the asset's biome mask. We also prohibit occupied tiles being placed on river tiles, as the composition becomes quite difficult. Overlaps are allowed, as long as the overlapping assets are in the same composition group.
Placing trees
Next, we go through each land subtile on the map and we use the vegetation density as a probability value for if the subtile will be attempted to be used as a starting point for vegetation. This time, we filter the assets by only selecting ones in the category "Trees". Biome compatibility and river prohibition are applied as in the case of mountain placement.
Placing props
Next, we generate a large number of random positions on the map, and we use them as potential starting locations for props. Yet again, we filter the assets appropriately to get the candidates of interest ( skulls, logs, stumps, reefs, etc) and we apply the same conditions as in mountains and trees: biome compatibility and river prohibition.
Cleaning up the data
Now we have a list of prop references and prop offsets per world subtile. We sort these so that the ones on the bottom left will be rendered last. Additionally, for each prop, we identify if all of it's occupant subtiles are 5 layers deep or more, and we remove those assets as they will never be rendered (we will only render up to 4 layers of such props). Finally, we build the GPU texture from the resulting data.
Step 4: Render props on map
The structure used for rendering is an "image" where each pixel stores information about what props need to be rendered where. Instead of having a vector of (atlas_element_index, map_location), which is not too GPU-friendly, especially if we have 100k props, we take another approach: For each subtile on the map, we store references to up to four subtiles of props. The required data per layer are the following, and they easily fit into a 128-bit texel (RGBA32).
- Atlas element number of animation frames
- Atlas element rect corner X
- Atlas element rect corner Y
- Atlas stride X ( when we have an animation, use the stride to jump to other frames)
The size of the rect that we render is conveniently constant: it's the size of the subtile. This, appropriately optimized **should** be quite efficient, but alas, the rendering shader is very slow on an intel-powered laptop with an oldish card. But that's a different story. Here's a video with the results.
There's still room for improvement (there always is), but I need to proceed to framework improvements, so for now, this is the sort of map visuals that will be used. Well, with less reefs for sure :)