AI: Overworld Adventures Test - Response Curve Tool
That's my progress --> 
Originally I was hoping that by this week I'd have an example using utility AI. Well, I miscalculated how much time things take. On the plus side, I developed a tool that is going to help with setting up the curves properly and visualize how considerations are combined together. The tool has a GUI (using AntTweakBar) that allows adding/removing considerations, adjusting curves, setting up mock inputs, calculating scores and saving/loading to a file (as a list of lines in the form "consideration_name normalized_input curve_type curve_coeffs"). Here's how it looks like:
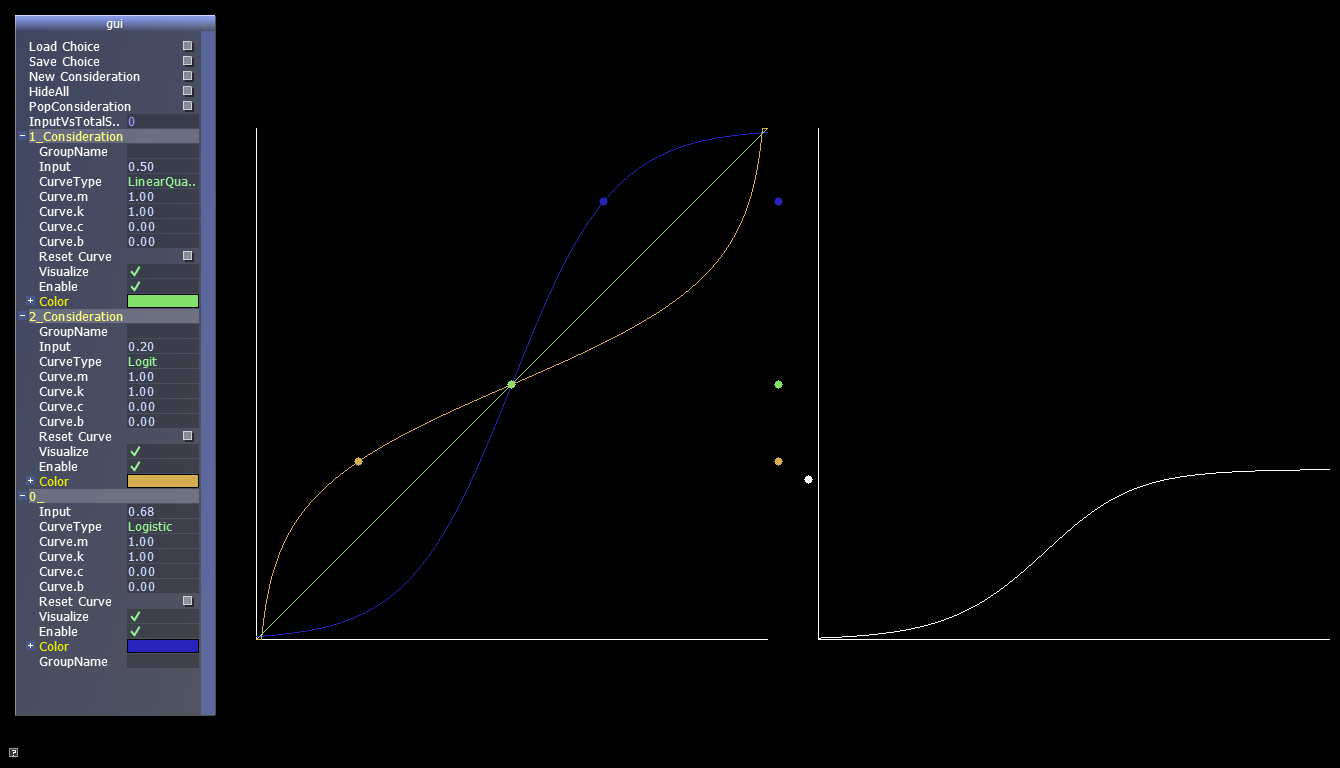
The left graph shows all the response curves from all considerations and the right graph shows how the final score varies depending on the input value of one of the considerations. The points correspond to input values (on graph, as well as stacked)
So, here are current curves that I'm going to use for the AI.
VisitTemple Choice
If we have low health, give a big boost to score (purple curve). If we have zero coins we won't go to the city (green curve == zero), but otherwise the score rises quickly. Distance has a small effect (the closer the better), as it's not as important as health for example.
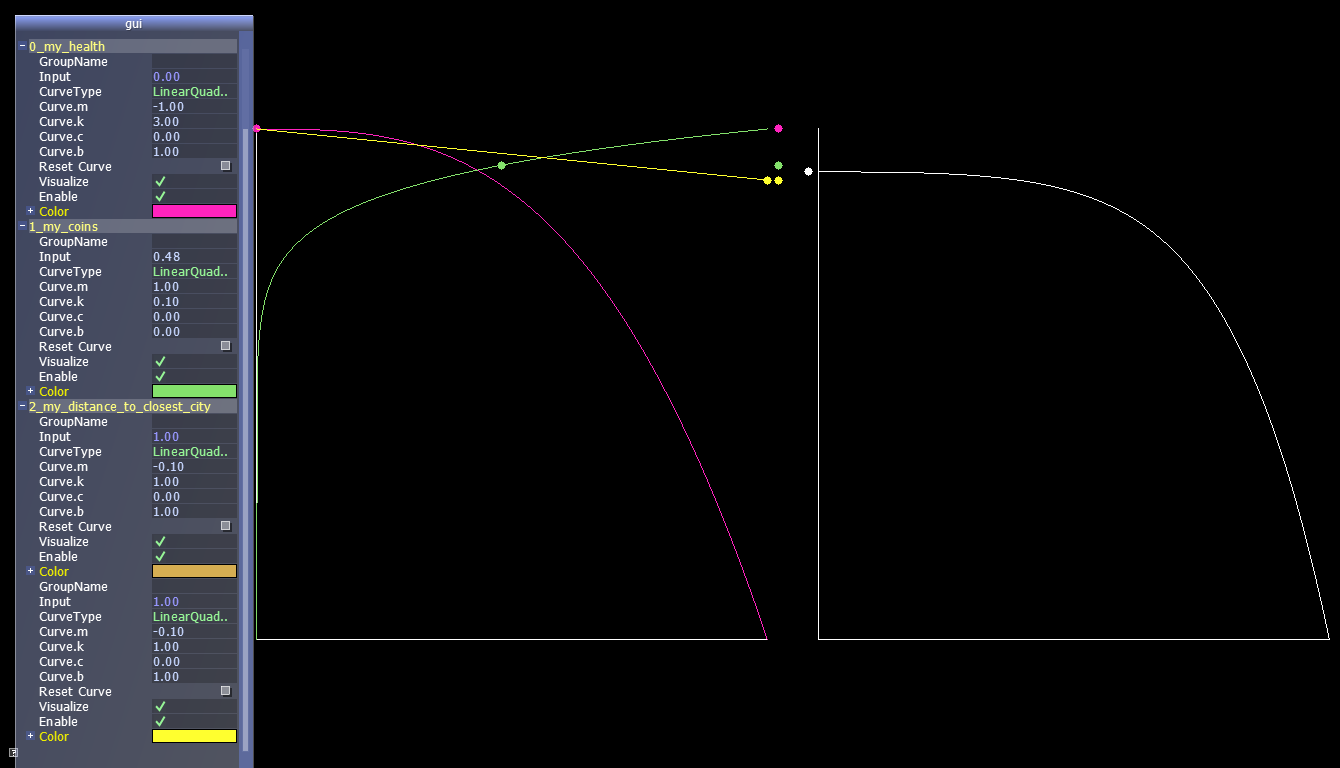
VisitBlacksmith Choice
Blacksmith will provide boost to power and health. It's not as important as getting rations or healing, so we'll need more coins to get higher score. Distance again is not that important. If I'm in the city and I have enough rations and on full health, I should be choosing this.

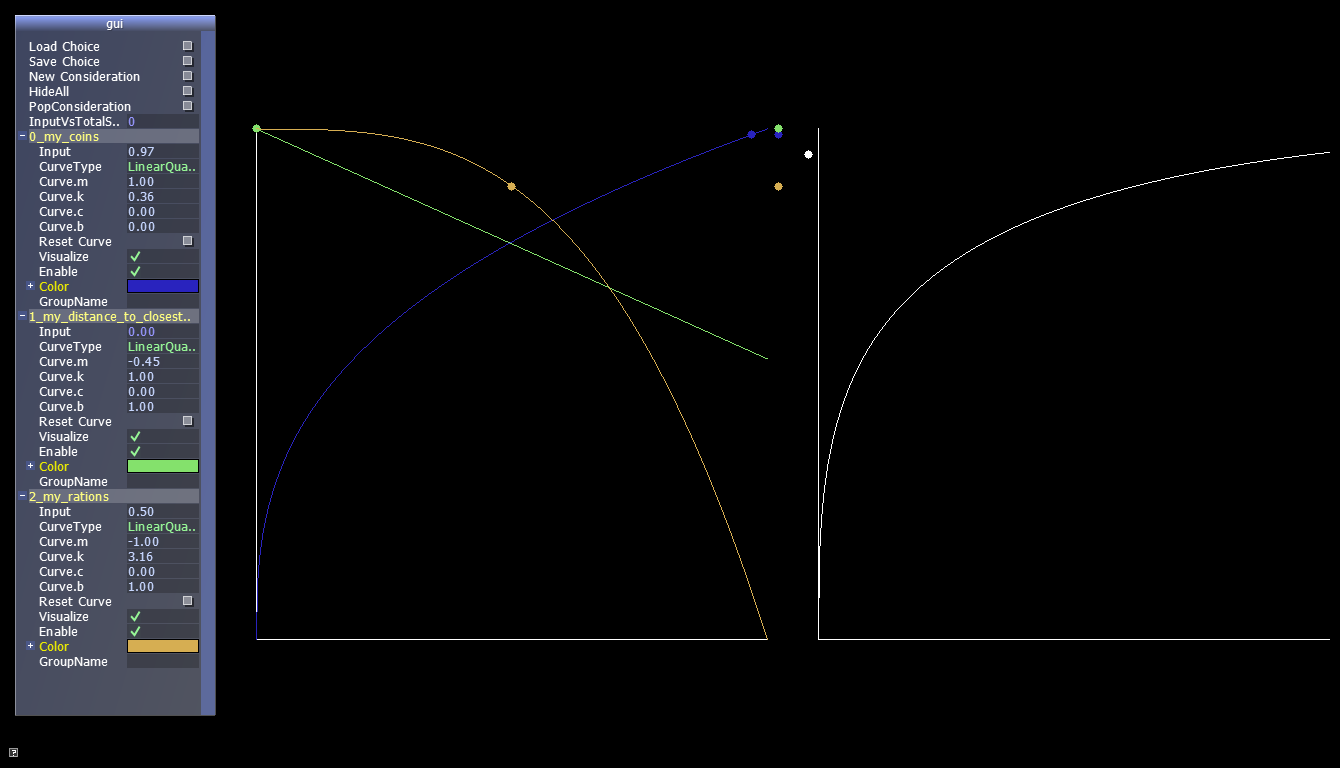
VisitGrocer Choice
This depends on the current number of rations (yellow curve), distance to city (green curve) and current coins (blue curve). Low number of coins or high number of rations lower the score quickly.
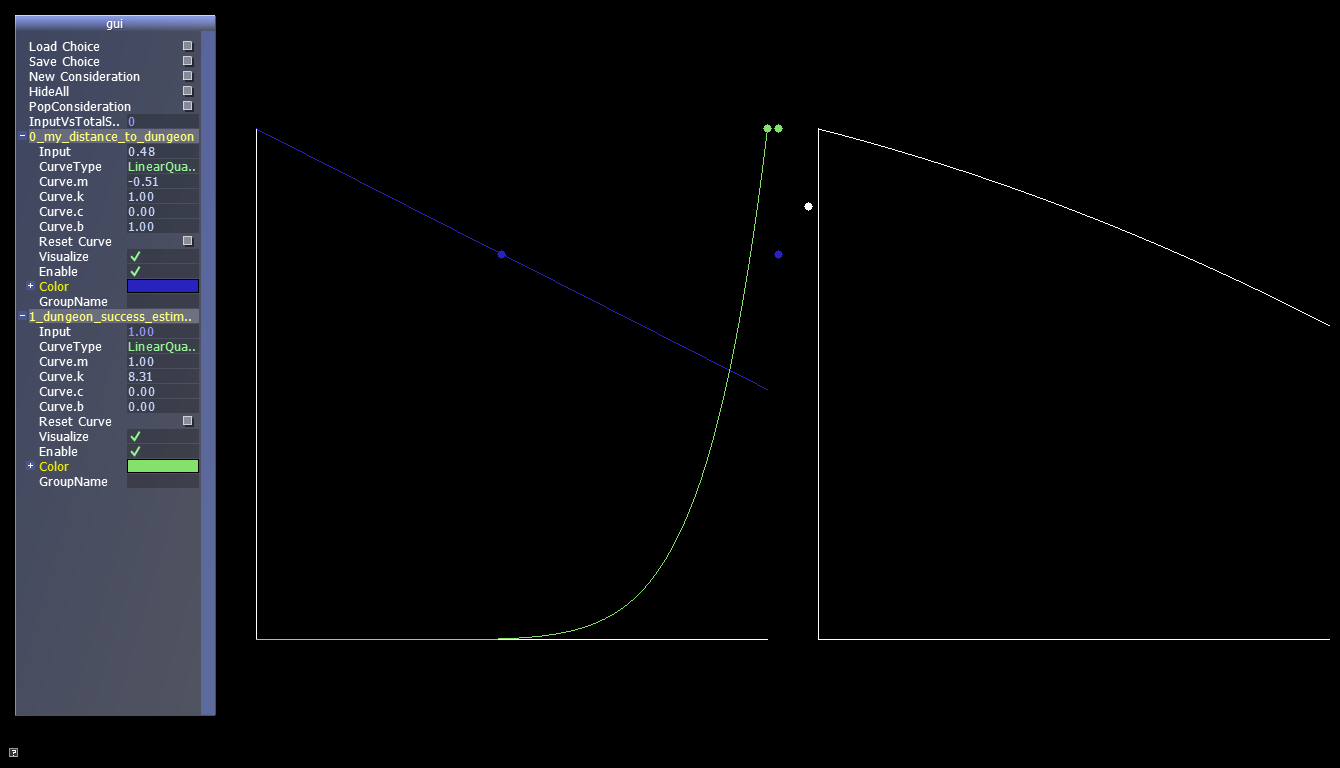
RaidDungeon Choice
If we have 50% chance or below of clearing the dungeon, don't go (green curve). It also depends on the distance: closer is better
SelectDungeon Choice (Selecting the best dungeon out of a list of available ones)
Use the RaidDungeon choice, applying it to each dungeon in the list and select the best.
So... that's so far. I've made the curves and I need to make sure the (now, moderately complex) behavior tree does all the magic by itself...